Chapter 16: BioExcel Building Blocks
This chapter provides a brief overview of using the BioExcel Building Block (biobb) to prepare biomolecular systems for molecular dynamics simulations with GROMACS, starting from PDB file manipulation. For detailed instructions and the latest features, please consult the official biobb website .
16.1 Introduction
16.2 Installation
16.2.1 Installing Conda Environment
We will install the package through the miniconda environment to minimize the complication.
Step 1: Download and Installation
- Download Miniconda from Miniconda official page.
Step 2: Add Miniconda to Environment Variables Make sure to add Miniconda to the system PATH.
- Go to System Environment Variables.
- Under System variables, scroll down and select Path, then click Edit.
- Click New and add the following paths (adjust if installed elsewhere):
- C:\Users\YourUsername\miniconda3
- C:\Users\YourUsername\miniconda3\Scripts
- C:\Users\YourUsername\miniconda3\Library\bin
- Click OK to save and exit.
Step 3: Activating conda Environment
Open Command Prompt and run:
conda create --name myenv python=3.10- Create the python 3.10 version Environment. Omit it to use the latest version available.conda activate name_env- If you created an environment (e.g., name_env)conda init- If conda is still not recognized, initialize it manuallyconda --version- varify the conda versionconda info --envsorconda env list- list existing envirnmentsconda deactivate- Deactivate a conda environmentconda create --name new_env_name --clone old_env_name- Create a old envirnment with the New Nameconda remove --name env_name --all- Remove conda envirnment
Step 3: Installing Necessry Packages
conda install -c conda-forge jupyterlab- Installing latest version of Jupyter labconda install matplotlib- Installing packages.
We will run the python envirnment in windows. The biobb can be installed using pip. Below providing the installation of useful function to run biobb.
pip install biobb-common- base package required to use the biobb packers.pip install nglview- A Python widget to interactively view molecular structures and trajectories, which utilizes the embeddable NGL viewer.pin install utils- A common helper module. It stores resuaable functions (file handling, logging, math operations, etc.).
16.3 Biobb Installation
This section provides the guidences to install biobb in a WSL2 environment using Conda and set it up to run in JupyterLab, which makes it easier to document and visualize results. If you haven’t set up WSL2 yet, follow the instructions in Section 16.3.1: Windows Subsystem for Linux 2 (WSL2).
Because some of the necessary packages doesn’t support after python 3.10, we will use conda environment run the biobb in python 3.10.
conda create -n biobb_env python=3.10- create a new environment for biobb.conda activate biobb_env- activate the enviroment to install biobb.
First, we will install jupyter lab in biobb_env and configure it for easy launch.
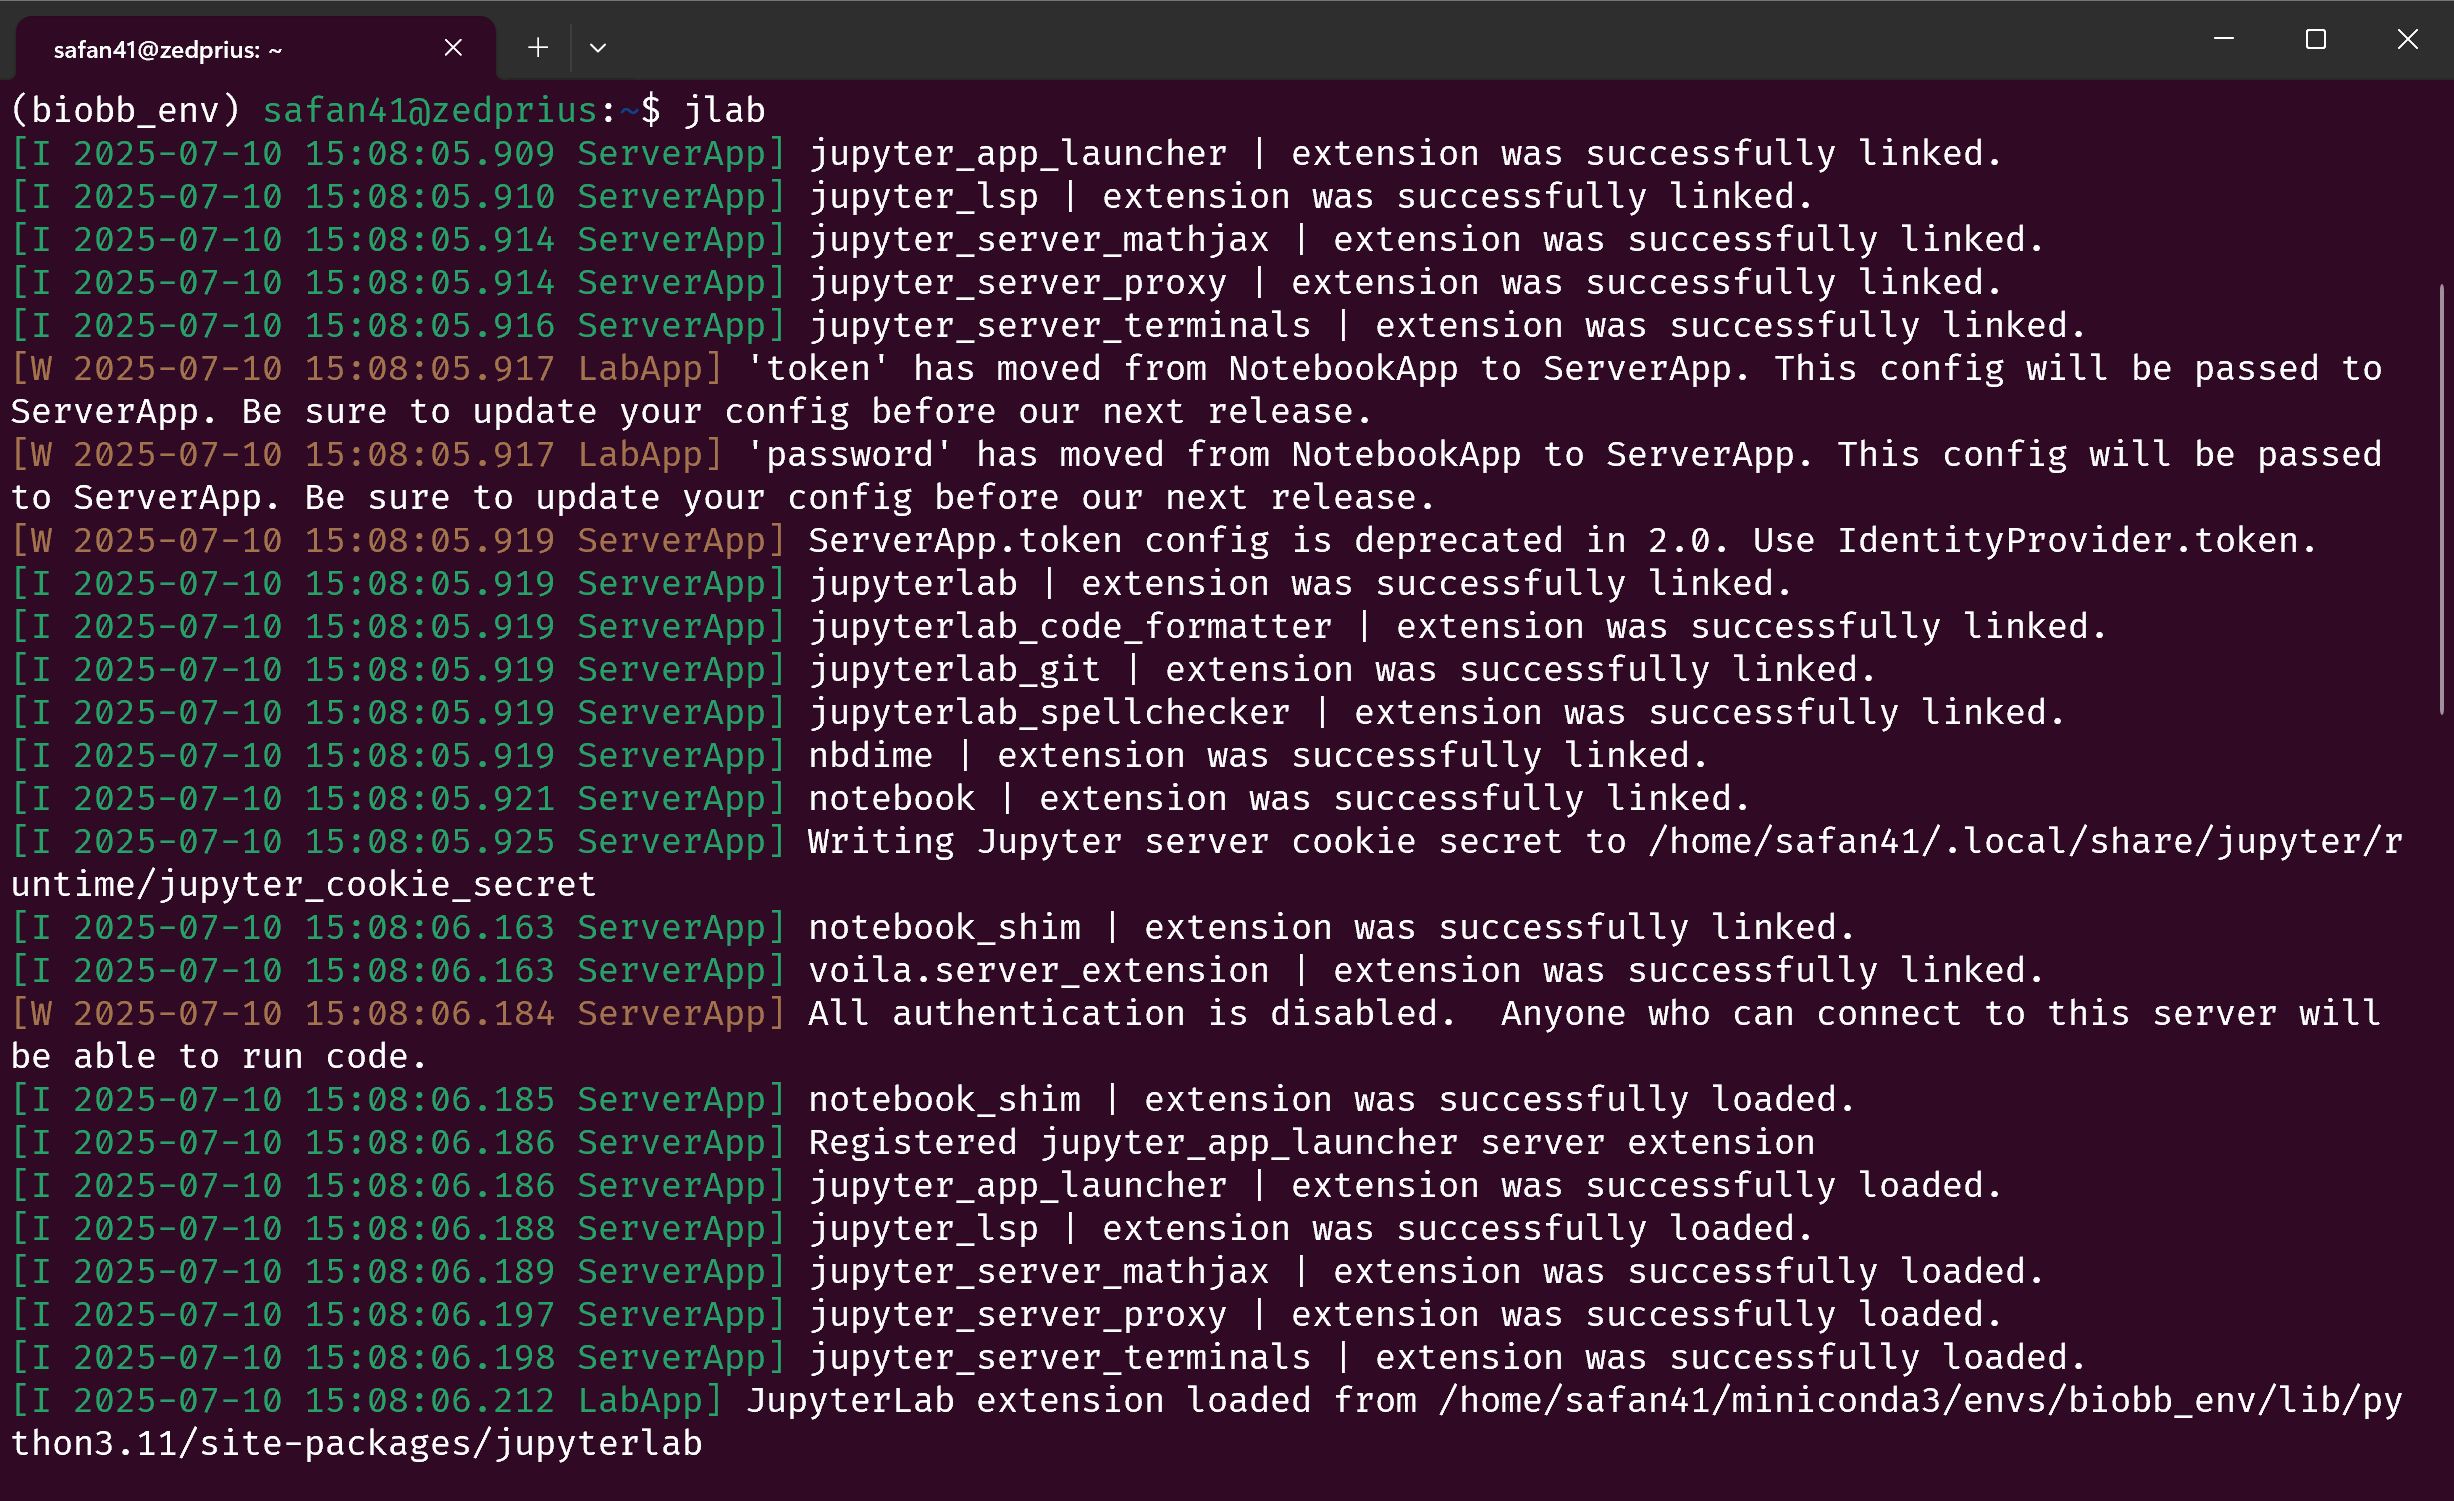
conda install -c conda-forge jupyterlab- With the environment activated, install Jupyter Lab.jupyter lab --no-browser --ip=0.0.0.0- Start the jupyter lab after installing.
The open your browser in Windows and type:
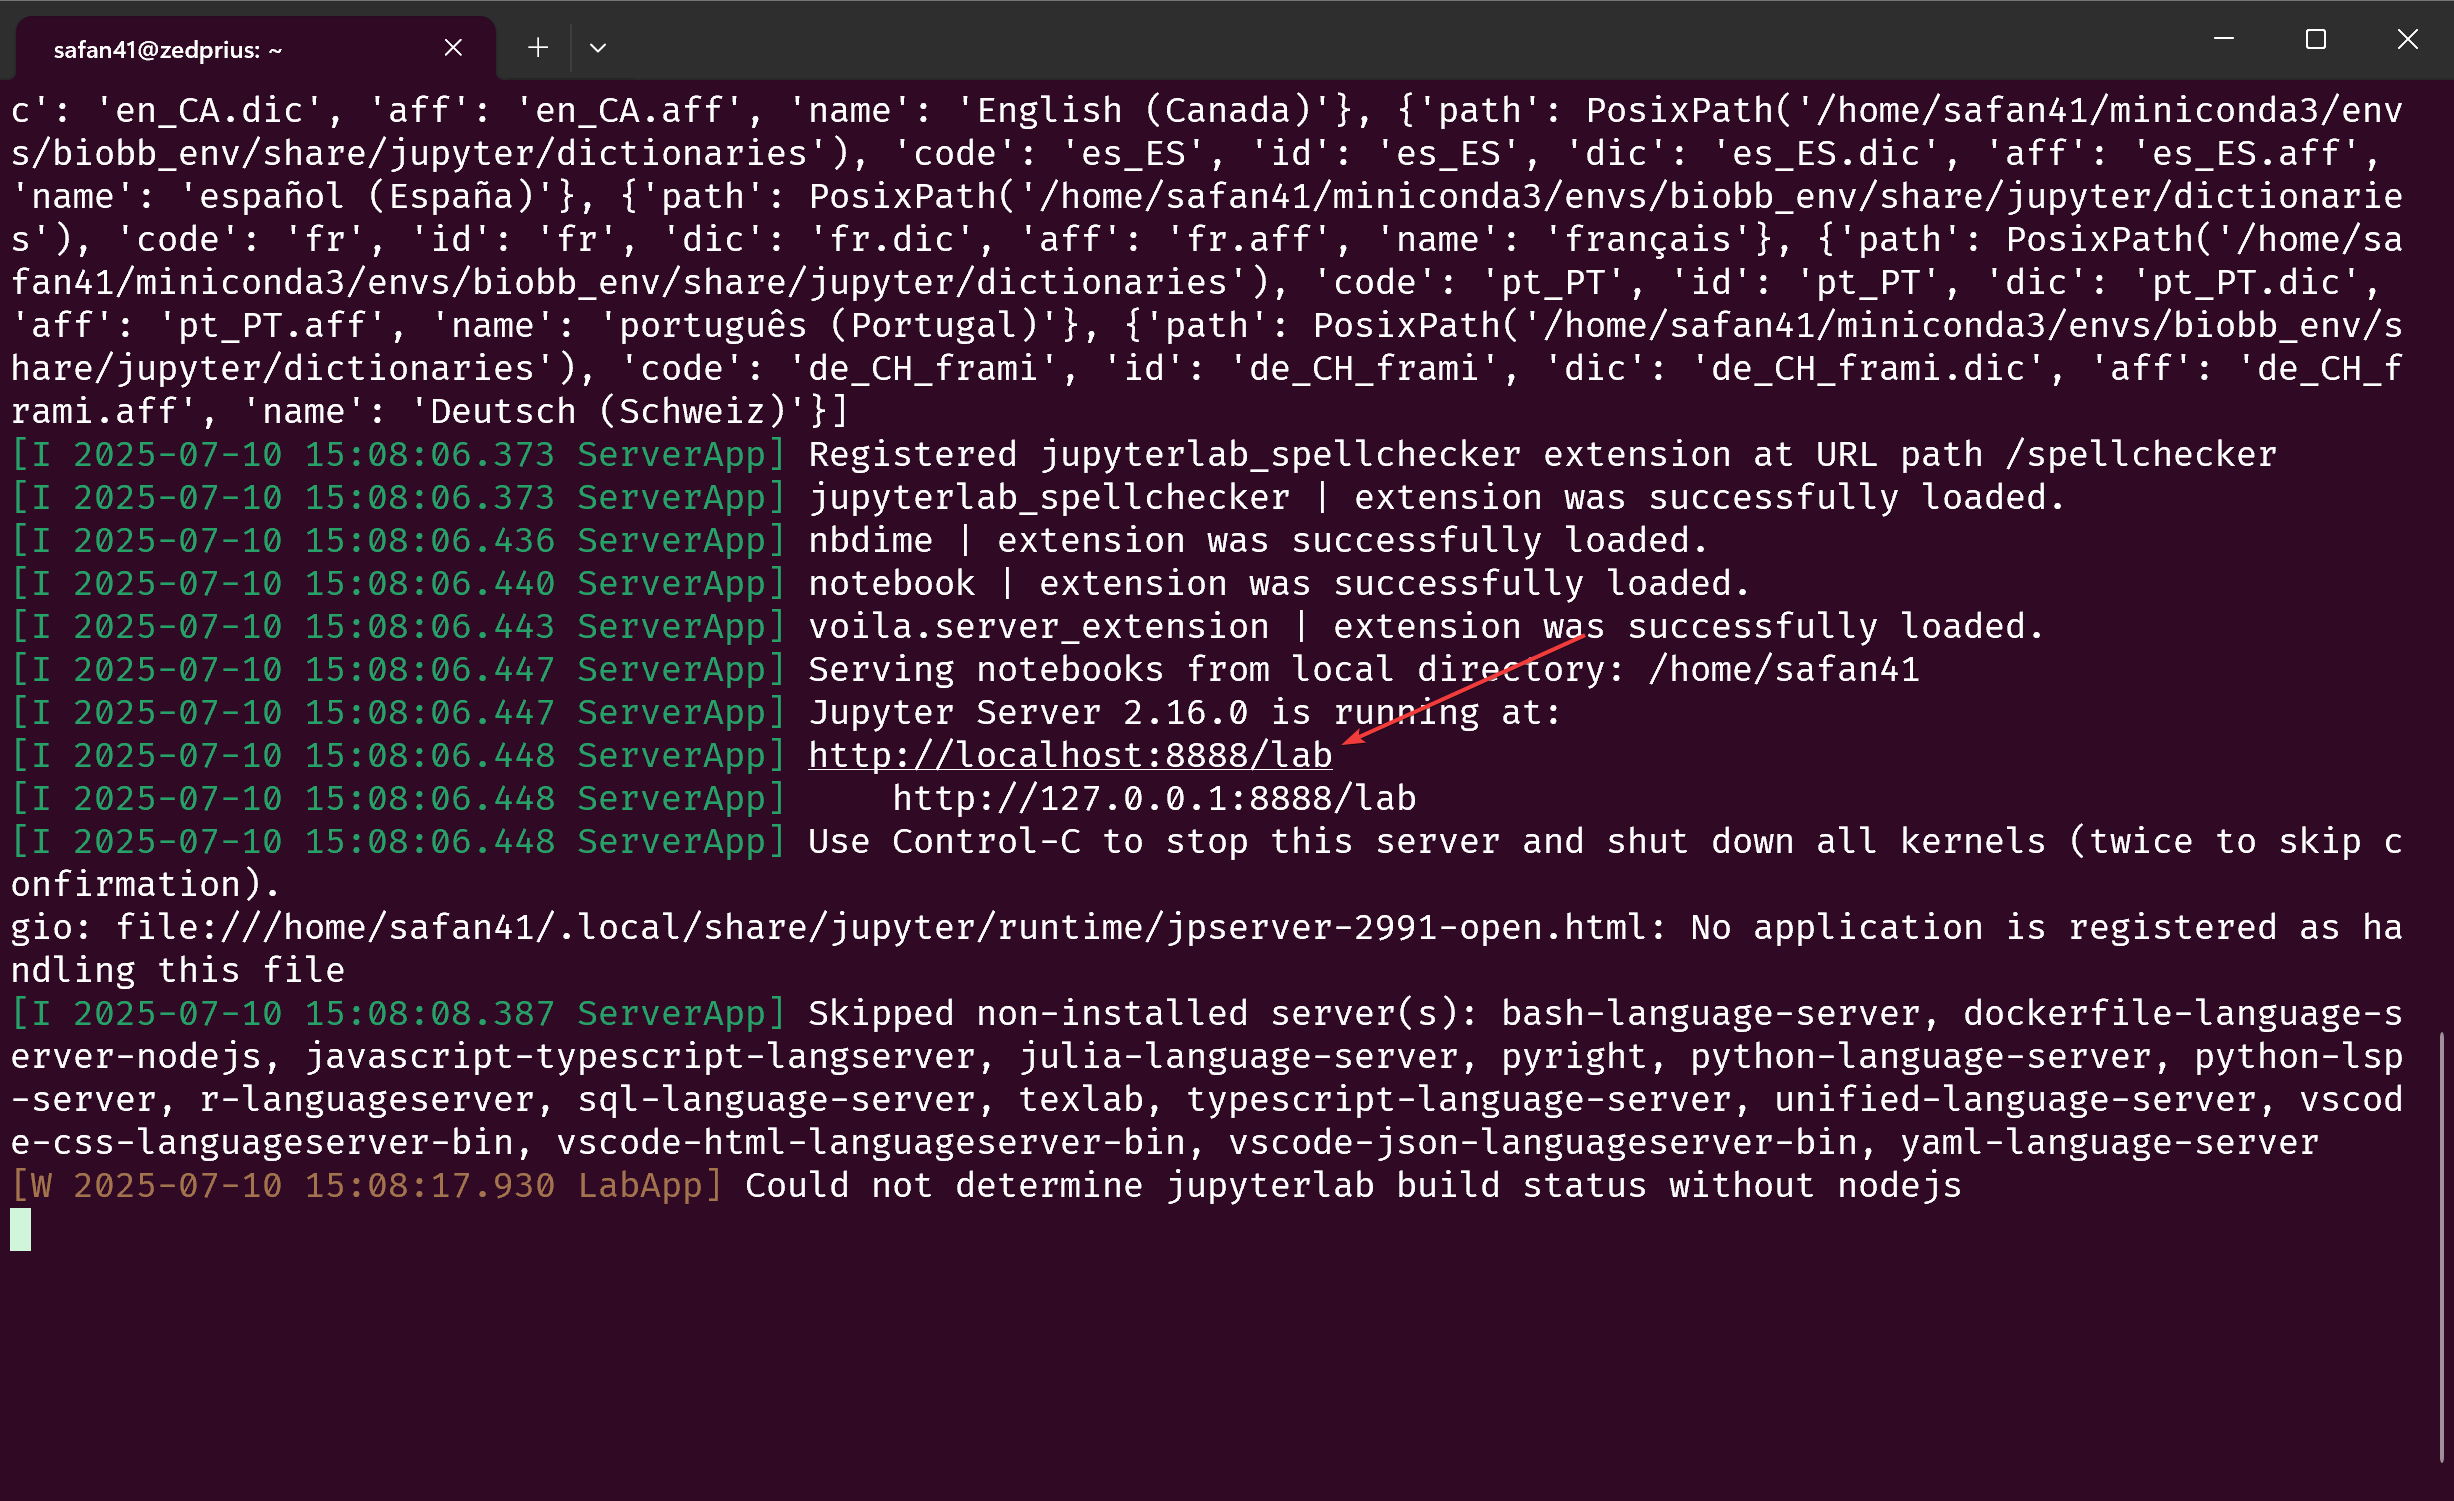
http://localhost:8888- start the jupyter lab notebook at port 8888.
- If port 8888 is in use, start Jupyter on a different port::
jupyter lab --no-browser --ip=0.0.0.0 --port=9999- Typically, Jupyter lab will ask for a password or token, you can retrieve the correct token by running:
jupyter server list- This outputs something like:Currently running servers: http://127.0.0.1:8888/?token=xxxxxx123456 :: /home/user. Copy the token from the URL (token=xxxxxx123456) and use it to log in
We can simplify the jupyter lab launch through:
vi ~/.bashrc- Open using vi editorEscthen:i- To switch vi editor to insert mode- Enter
alias jlab="jupyter lab --no-browser --ip=0.0.0.0"at the end of the file. Escthen:wq- To save and exist vi editor.
Reintialize the .bashrc through one of the following step:
- Close the terminal and restart OR
source ~/.bashrc: Run this in the command prompt. After that , reactivate the'biobb_envthrough runconda activate biobb_envin the command prompt.
jlab- This starts Jupyter Lab.
If Jupyter Lab is asking for a password or token, you can retrieve the correct token by running:
jupyter server list- This outputs something like:Currently running servers: http://127.0.0.1:8888/?token=xxxxxx123456 :: /home/user. Copy the token from the URL (token=xxxxxx123456) and use it to log in
If you don’t want to enter a token every time, disable token authentication by running:
jupyter lab --NotebookApp.token='' --NotebookApp.password=''
Or configure it permanently by running:
jupyter lab --generate-configecho "c.NotebookApp.token = ''" >> ~/.jupyter/jupyter_lab_config.pyecho "c.NotebookApp.password = ''" >> ~/.jupyter/jupyter_lab_config.pyjlab-b To access the jupyter in windows browser.
To install biobb in conda environment, All the dependencies must be installed separately. Follow these steps to install required dependencies:
conda activate biobb_envconda install -c bioconda "biobb_io==5.0.1"conda install -c conda-forge biopython=1.79 -y- biopython is required to install before installing biobb_model.conda install -c bioconda biobb_model>=5.0.0 -yconda install -c conda-forge gromacs=2022.2- To install gromacs 2022.2conda install -c bioconda biobb_gromacs>=5.0.0 -y- To install biobb_gromacsconda install -c conda-forge ambertools=22.5 -y- Need to install AmberTools from conda-forge before installing biobb_analysis. Ambertools is required for MMPBSAconda install -c bioconda biobb_analysis>=5.0.1 -yconda install -c bioconda "biobb_amber>=5.0.4"- biobb_amber allows setup and simulation of atomistic MD simulations using AMBER MD package and its associated AMBER tools.
We also install additional tools for visualization:
conda install -c conda-forge simpletraj -y- To install simpletraj, Lightweight coordinate-only trajectory reader based on code from GROMACS, MDAnalysis and VMD.conda install -c conda-forge nglview -y- To install nglview, Jupyter/IPython widget to interactively view molecular structures and trajectories in notebooks.conda list- to check installed packages.
16.4 Verifying Environment
Now, Biobb and all necessary dependencies should be installed.
To verify, run jlab in a terminal. In a few seconds, your terminal should look something like this:
Ctrl+Click the link where it says “Jupyter Server (version number) is running at:” to open it in your browser. This should open a jupyterlab instance with all the modules needed installed.
Download this python notebook file and upload it into JupyterLab using the file menu at the top left corner.
Run the first cell in the notebook by pressing the play button. Your output should look like this:
If your output does not look like this, reread each step of this page to ensure you didn’t miss any commands. If you’re still having trouble consult the FAQ
Congratulations, you’ve completed the local environment setup!
16.5 PDB Reader and Manipulator
The following module are required to visualize and edit pdb file
import nglview as nvimport ipywidgetsfrom utils import *view = nv.show_structure_file("1aki.pdb")view.add_representation(repr_type='ball+stick', selection='all')view._remote_call('setSize', target='Widget', args=['','300px'])viewhelp(view.add_representation)- Help on method add_reprentation in module nglview.widget.
We will use ChimeraX to clean the water molecules and adding hydrogens and missing atoms.