Chapter 1: Getting Started with Unity
Unity is a powerful development platform used to create 2D and 3D games, simulations, virtual reality (VR) environments, and interactive applications. This chapter introduces the basic steps required to install Unity, set up the development environment, and create your first project.
1.1 Installing Unity Hub
The recommended way to install Unity is through Unity Hub, which is a management application used to install different versions of the Unity Editor, create projects, and manage development modules.
To download Unity Hub:
- Locate the Download Unity Hub from the official Unity website .
- Download the installer for the Windows operating system.
- Run the downloaded installer and follow the installation prompts.
Once the installation is complete, launch Unity Hub.
1.2 Creating or Signing in to a Unity Account
After launching Unity Hub, you will be prompted to sign in with a Unity account.
- Existing Users: Enter your credentials to log in.
- New Users: Click “Create account” to set up a new Unity ID.
A Unity account is required for managing software licenses, accessing the Unity Asset Store, and utilizing cloud-based features like Version Control or Unity Gaming Services.
1.3 Installing the Unity Editor
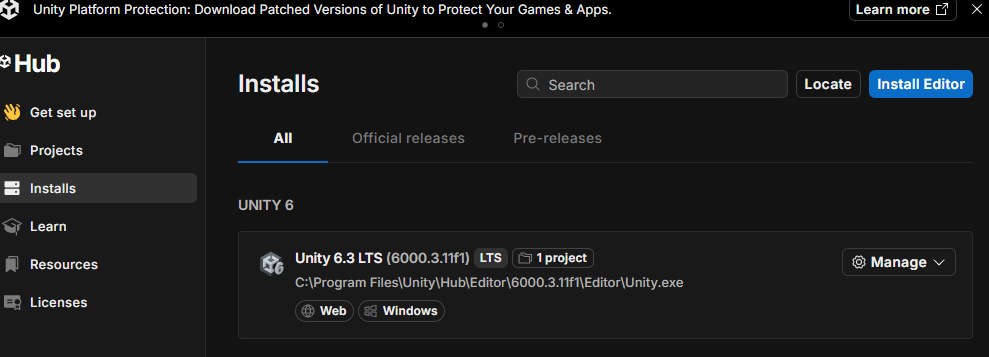
The Unity Hub acts as a management dashboard. It does not contain the game engine itself; instead, you can use the Unity Hub to download and manage different versions of the Unity Editor (see Figure 1). The Unity Editor is the primary development environment used to create games and interactive applications. To install the Unity Editor:
- Open the Installs Tab: In Unity Hub, navigate to the Installs tab and click Install Editor.
- Choose a Version: Select a Long-Term Support (LTS) version. LTS versions are the most stable and are recommended for long-term projects.
- The Unity Editor Environment: Once the installation is complete, the Unity Editor provides the primary workspace where you will develop your projects. In the Unity Editor, you can::
- Create, edit, and organize scenes
- Manage game objects, Physics components, and other elements
- Design 2D/3D games or VR environments
- Write and attach scripts to control object behavior.
- Test applications (games) using Play Mode.
- Build and export your final application for platforms like Windows, Android, or iOS.
1.4 Selecting Modules and Visual Studio
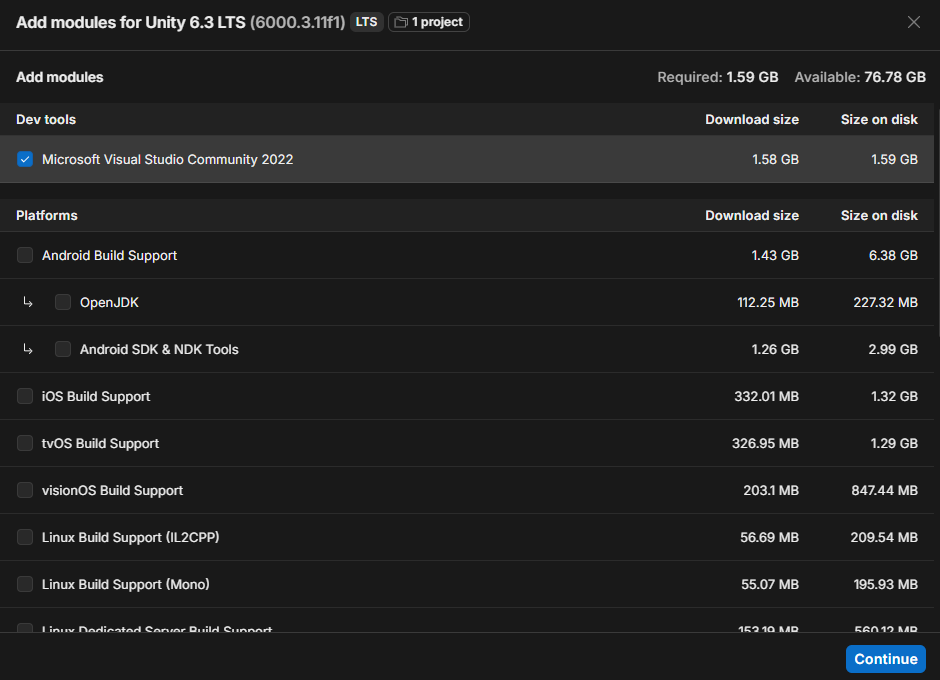
During the installation, you will be asked to add Modules. These are optional components that extend Unity’s functionality. Important modules to consider include:
- Microsoft Visual Studio: This is the Integrated Development Environment (IDE) used to write the C# code for Unity projects (see Figure 2). It provides tools such as code editing, debugging, and project management, making it easier to develop and maintain game logic.
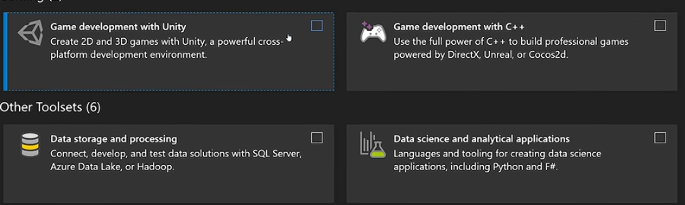
- Workload Selection: When the Visual Studio Installer opens, ensure to select the “Game development with Unity” (Figure 3). This option installs the necessary tools and libraries that allow Visual Studio to integrate with the Unity Editor for seamless scripting and debugging.
- Platform Support: If you plan to build for mobile devices, ensure that the appropriate platform modules are selected. For example:
- Android Build Support for Android devices and Meta Quest VR headsets
- iOS Build Support for Apple mobile devices
Selecting the appropriate modules during installation ensures that Unity has the necessary tools to build and deploy applications for your target platforms.
1.5 Activating the Unity License
Before using the Unity Editor, you need to activate a Unity license through Unity .
- In Unity Hub, click the Gear Icon (Preferences) in the top-left or bottom-left corner.
- Navigate to the Licenses section.
- Click Add or Activate New License.
- Select Unity Personal.
Note: The Personal License is free for individuals, students, and small businesses with less than $200,000 (USD) in annual revenue or funding.
1.6 Creating a New Unity Project
After installing the Unity Editor, you can create your first project. To create a new project:
- Open Unity Hub.
- Navigate to the Projects tab.
- Click New Project.
- Select a template such as 3D (Core) or 2D depending on the type of application you want to create.
- Enter a project name.
- Choose a location on your computer to save the project.
- Click Create Project.
Unity will then open the Unity Editor with a new project workspace.
1.7 Overview of the Unity Interface
When the Unity Editor opens, several important panels appear in the workspace.
- Scene Window: The Scene window is where you visually design your environment. You can place objects, adjust lighting, and build the layout of your world.
- Game Window: The Game window displays what the user or player will see when the application runs.
- Hierarchy Panel: The Hierarchy panel lists all objects present in the current scene.
- Inspector Panel: The Inspector panel displays and allows modification of the properties of the selected object.
- Project Panel: The Project panel contains all project assets such as scripts, textures, models, and materials.
1.8 Running the Project
Unity allows you to test your application directly inside the editor. To run the project:
- Click the Play button at the top of the Unity Editor
- The application will start running in the Game window
- Click Play again to stop the simulation