Chapter 3: 2D Game with C Shape
3.1 Introduction
In this chapter, you will learn how to create a simple 2D game inspired by Flappy Bird using a Unity template. In this game, a bird navigates through obstacles, and a scoring system tracks each successful pass.
This tutorial provides a step-by-step introduction to game development in Unity, covering everything, including the user interface to lines of C Shape code.
3.2 Creating New Project
Follow these steps in Unity Hub,
- Select New Project to begin creating a project.
- Choose 2D (Core) template, which is optimized for developing 2D games.
- Name your project (for example,
Flarpy Blorb) - Select a location to save the project.
- Click Create to generate the project.
Once the project opens, you are ready to begin building your game.
3.3 Unity User Interface
In this section, you will become familiar with the default Unity user interface. As you explore the different panels, you will also begin adding elements to your scene, such as displaying a character (e.g., a bird) on the screen.
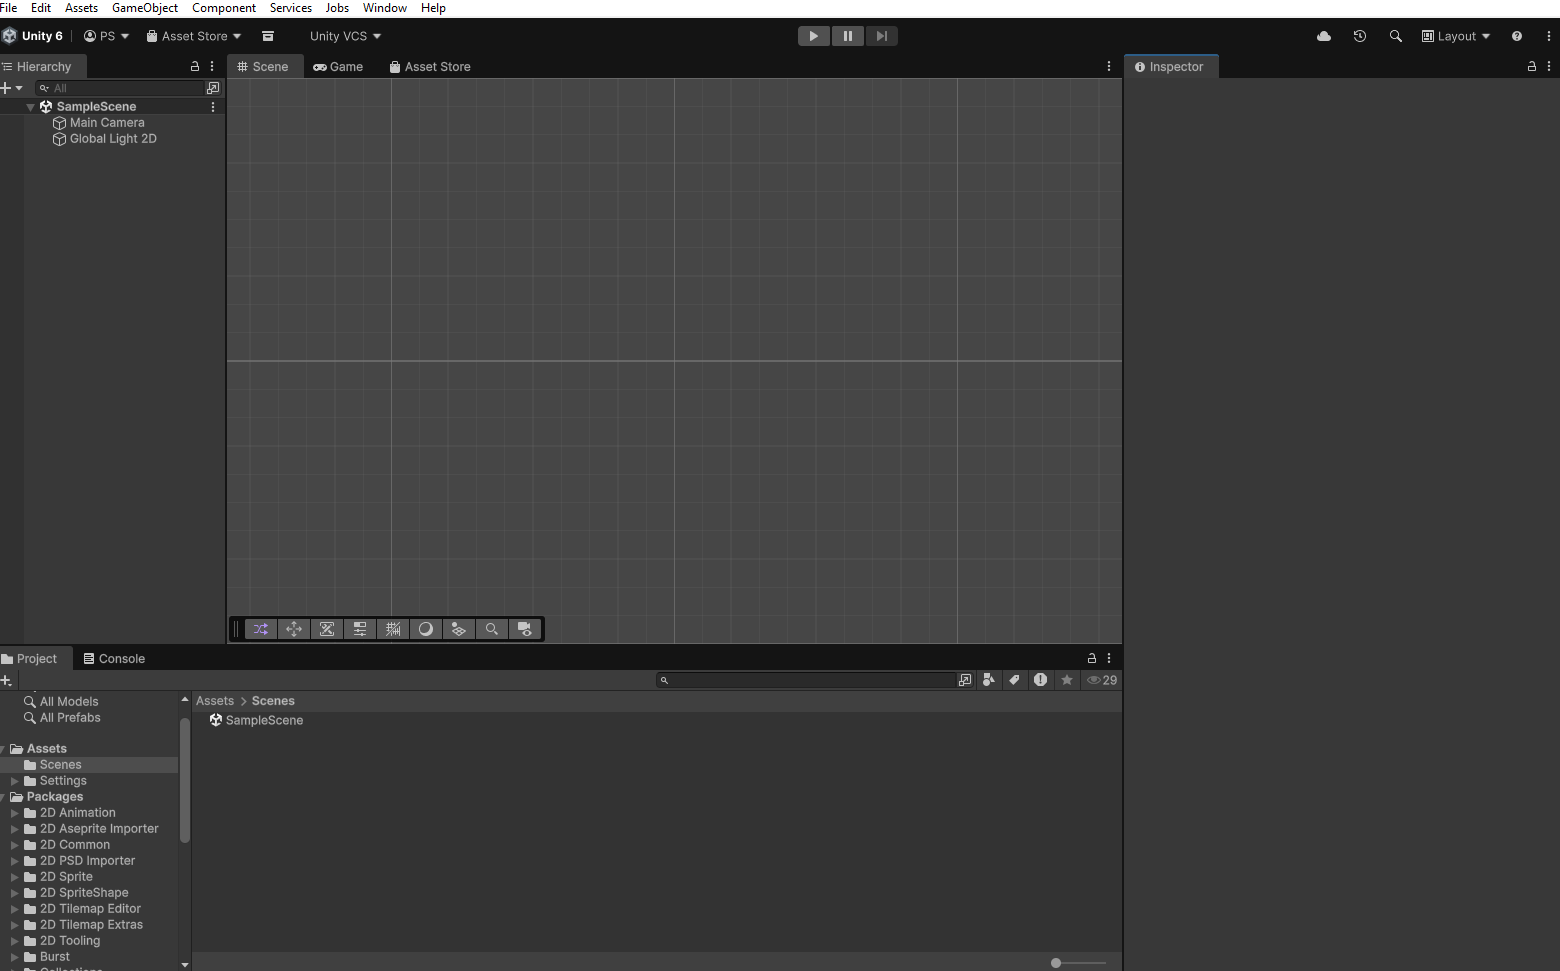
When Unity opens, the default layout is organized into several key panels (see Figure 1):(Figure 1): Project Panel, Hierarchy Panel, Scene Window, Game Window, and Inspector Panel.
- Creating and Importing Game Assets: Use Microsoft PowerPoint or a similar tool to design your game assets, such as the bird’s body and pipes. Save each image in .png format. To import these assets into Unity:
- Right-click inside the
Assets panelin the Project Panel. - Select
Import New Asset. - Choose your saved
.pngfiles and click Import.
Empty GameObject. - Right-click inside the
- Creating the Bird GameObject and Configuring: In the
Hierarchy Panel, we will begin by creating the bird object:- Right-click in the Hierarchy and select
Create Empty. - This creates a
new empty GameObject.
- Right-click in the Hierarchy and select
What is a GameObject?
A GameObject is the fundamental building block in Unity. It represents an object in the scene and always includes a Transform component, which defines its position, rotation, and scale. By default, a GameObject has no visual appearance or behavior—these are added by attaching components.
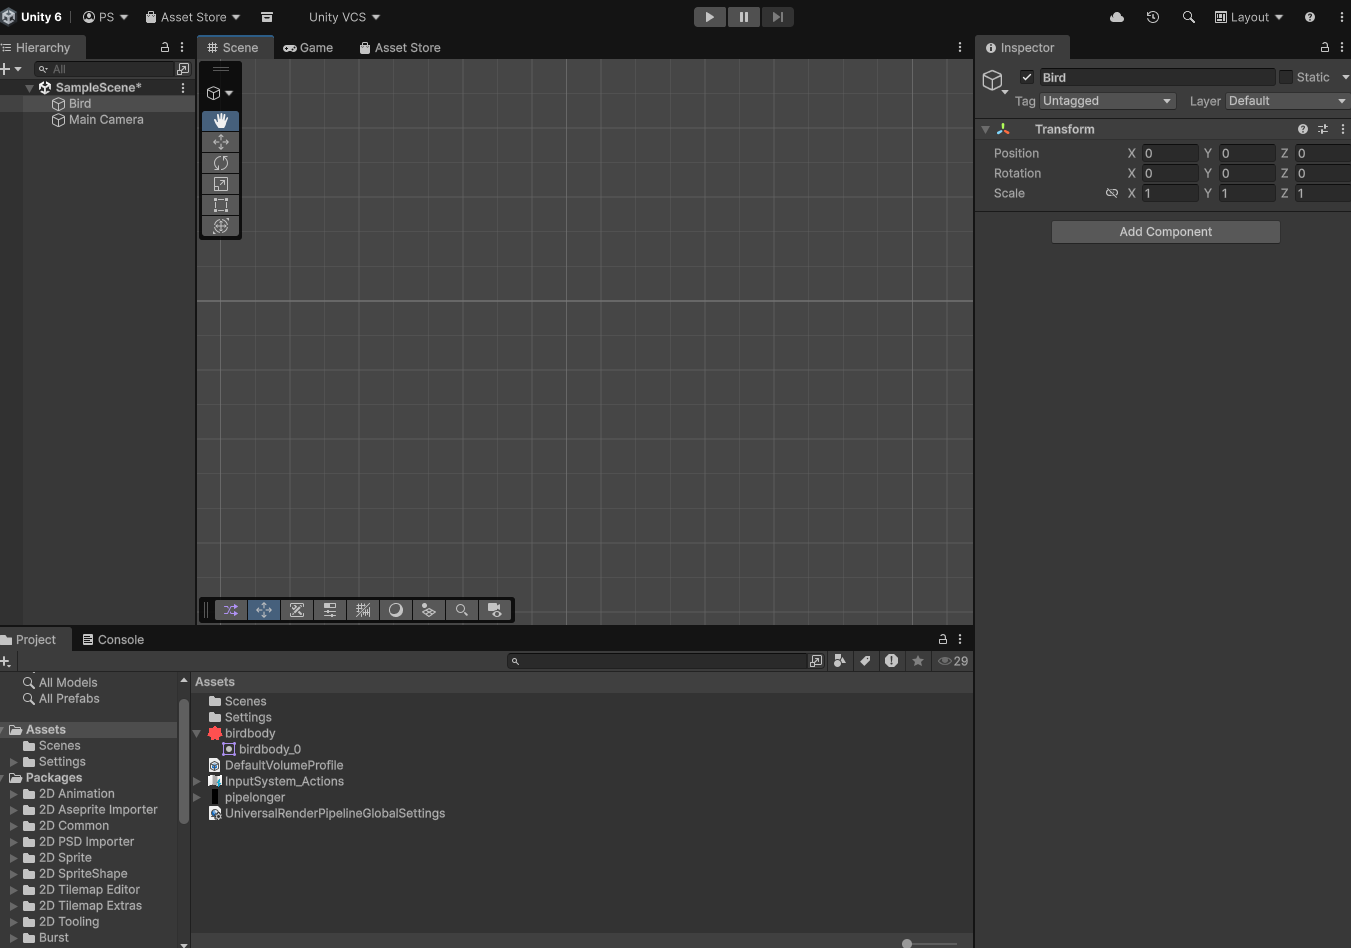
Next, configure the GameObject:
- Select the newly created GameObject.
- Rename it “Bird” (see Figure 2).
- In the
Inspector panel, locate the Transform component to view or modify:- Position
- Rotation
- Scale
All properties and attached components of a selected GameObject are managed through the Inspector Panel.
- Adding a Sprit Renderer To make the bird visible, we need to add a
Sprite Renderercomponent. In Unity, most elements in the scene—such as characters (bird and pipes), cameras, lights, and UI elements—are a GameObject with attached components that define their appearance and behavior. Follow these steps:
- With the Bird
GameObjectselected, click ``Add Componentin theInspector Panel`. - Navigate to
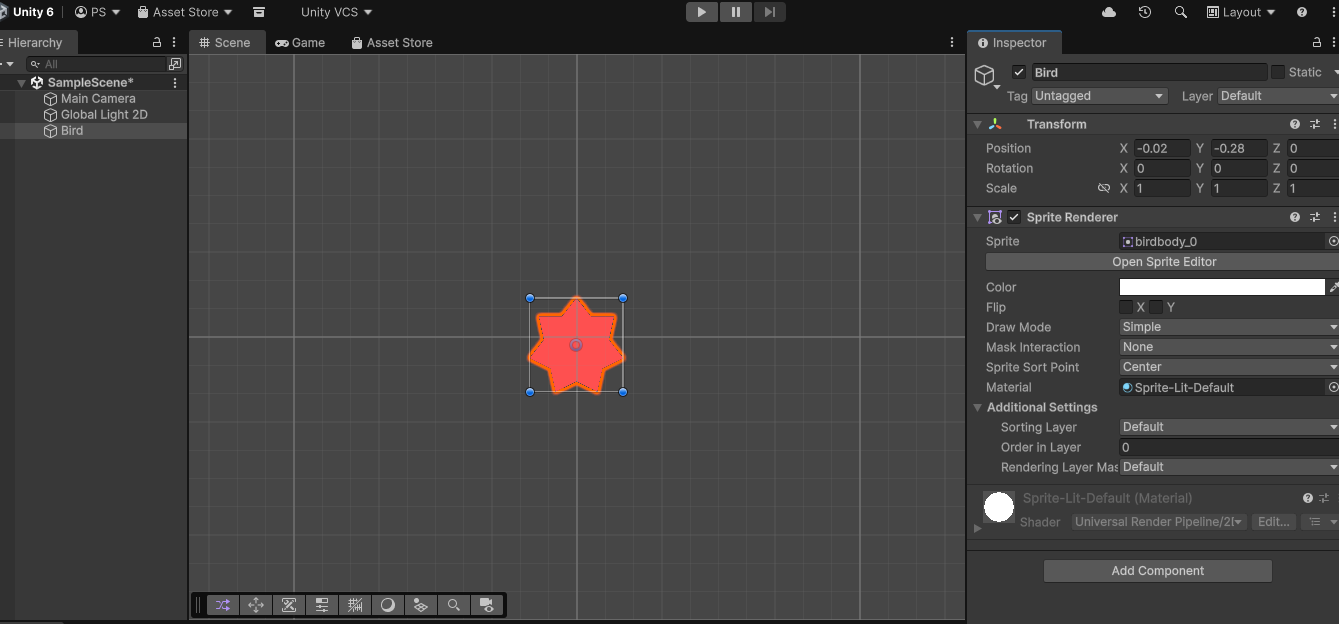
Rendering → Sprite Renderer. - In the
Spritefield, drag and drop the bird image from the Project Panel.
Once the Sprite Renderer is added, the bird will appear in the Scene Window (see Figure 3).
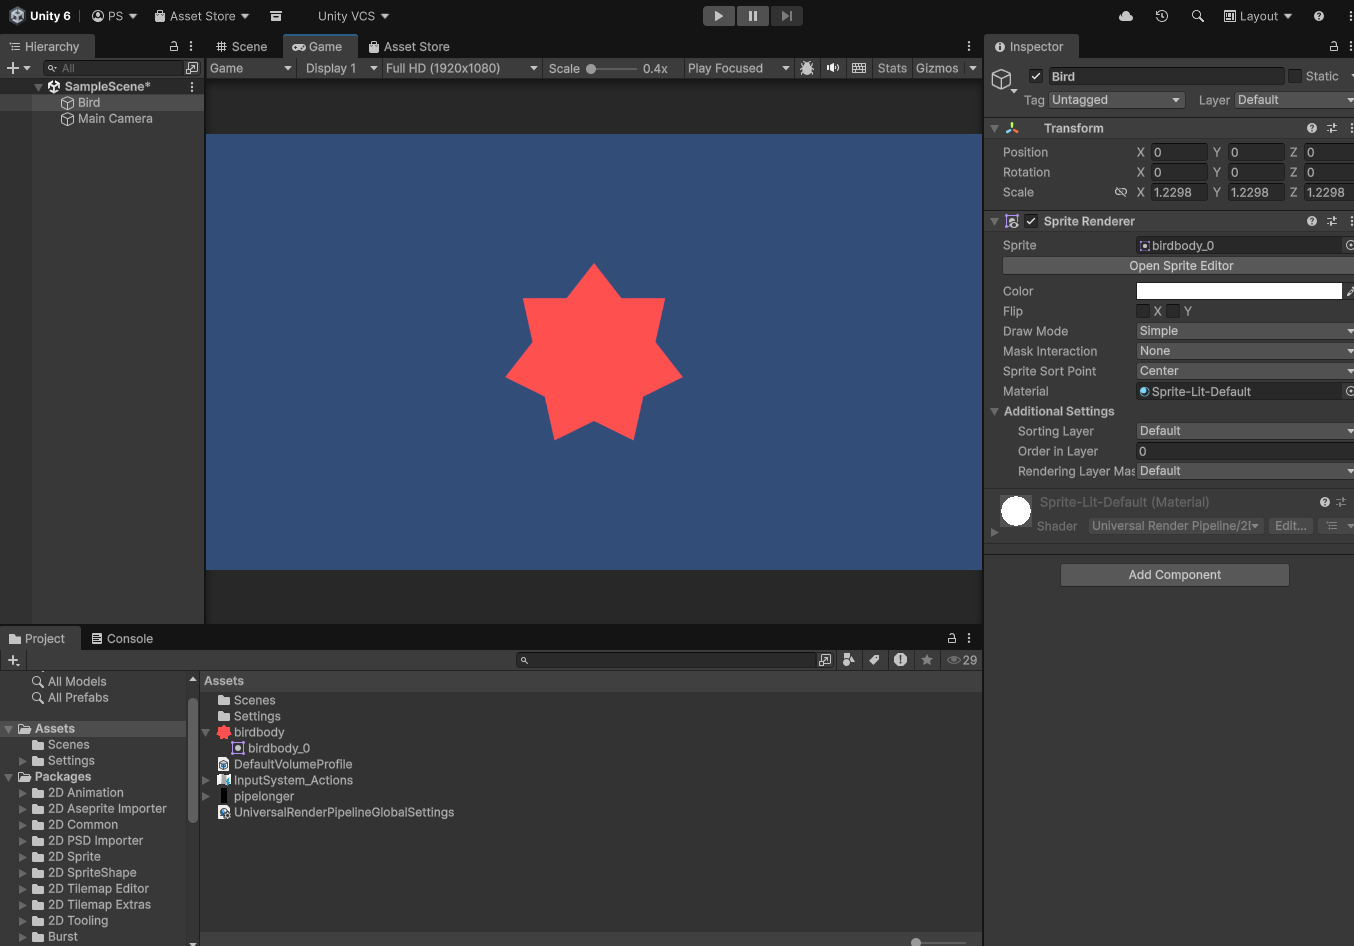
- Working with Scene and Game Views The Scene Window shows all objects in your current scene. You can move, rotate, and scale objects using the available tools. The Game Window shows what the player sees through the Main Camera.
Ensure Display 1 is selected so the camera is active. Use the resolution dropdown to choose an aspect ratio (e.g., 1920 × 1080) (see Figure 4).
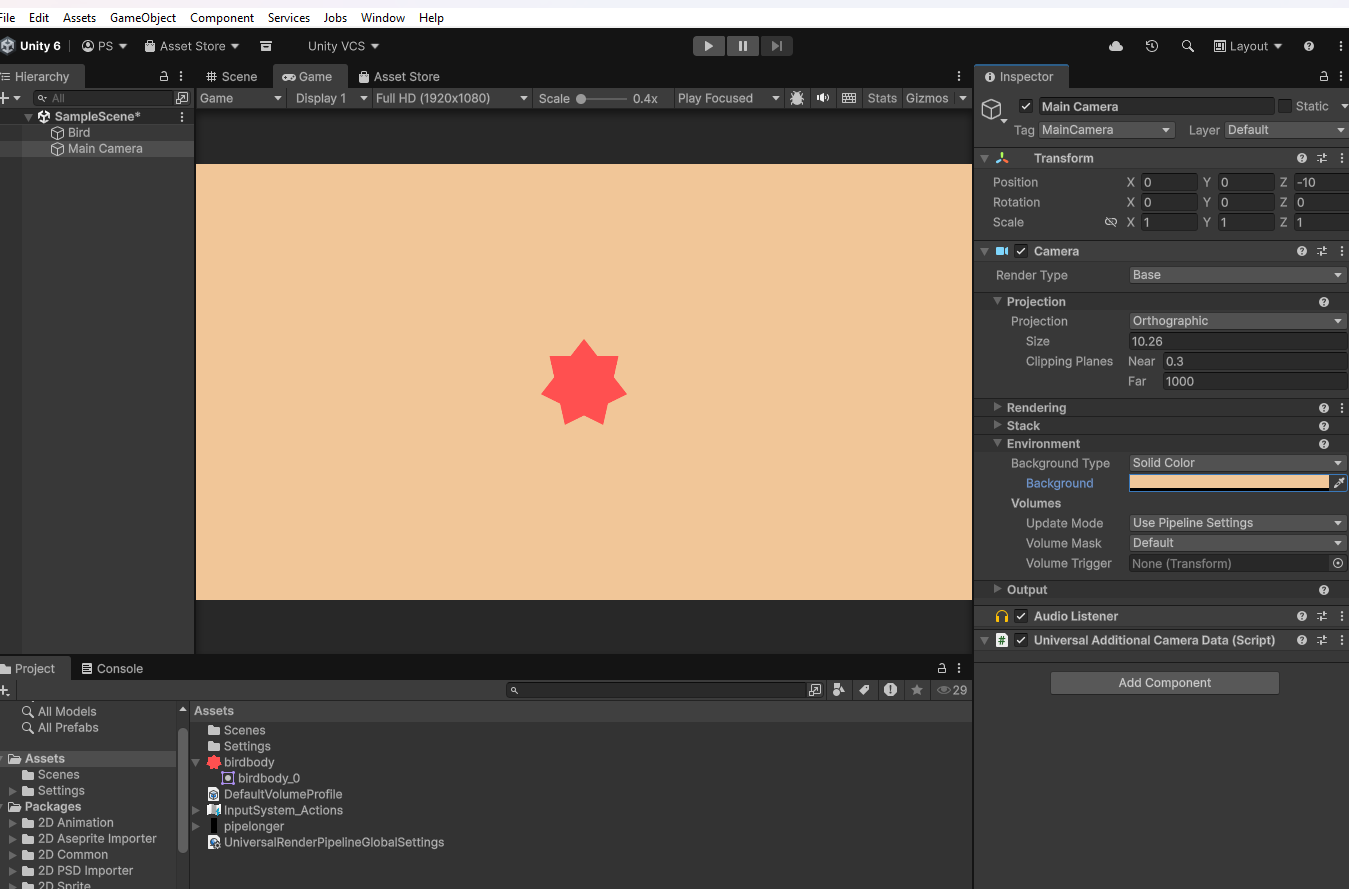
- Adjusting the Camera You may notice the bird appears too large. Instead of scaling the bird, we can adjust the camera:
- Select
Main Camerain theHierarchy. - In the Inspector, locate the
Camera component. - Increase the Size value (
Projection → Size) to zoom out (see Figure 5). - Optionally, change the Background Color (e.g., light brown).
- Select
- Testing the Scene Click the
Playbutton at the top of the Unity editor to run the scene. At this stage, you’ll see your bird on the screen—simple, but a solid starting point for building your game.
3.4 Physics and Programming
In this step, we will use additional components to turn the bird into a physics-based object affected by gravity. We will also introduce scripting to make the bird move upward when the spacebar is pressed.
- Enable Physics The
Rigidbody 2Dcomponent turns the bird into a physics-based object, allowing it to respond to forces such as gravity.- Select the
Bird GameObjectin the Hierarchy. - In the Inspector, click Add Component.
- Navigate to Physics 2D → Rigidbody 2D and select it.
- Select the
Once added, the bird will be affected by gravity and can interact with Unity’s 2D physics system.
Testing Gravity: Click the Play button. You will observe that the bird begins to fall due to gravity and eventually drops off the screen. This confirms that the physics system is working correctly.
- Adding a Collider and Writing Your First Script
- Adding a Collider: To allow the bird to interact with other objects, we need to add a collider:
- Select the
Bird GameObjectin theHierarchy. - In the
Inspector, click Add Component. - search
colliderand selectCircle Collider 2D.
- Select the
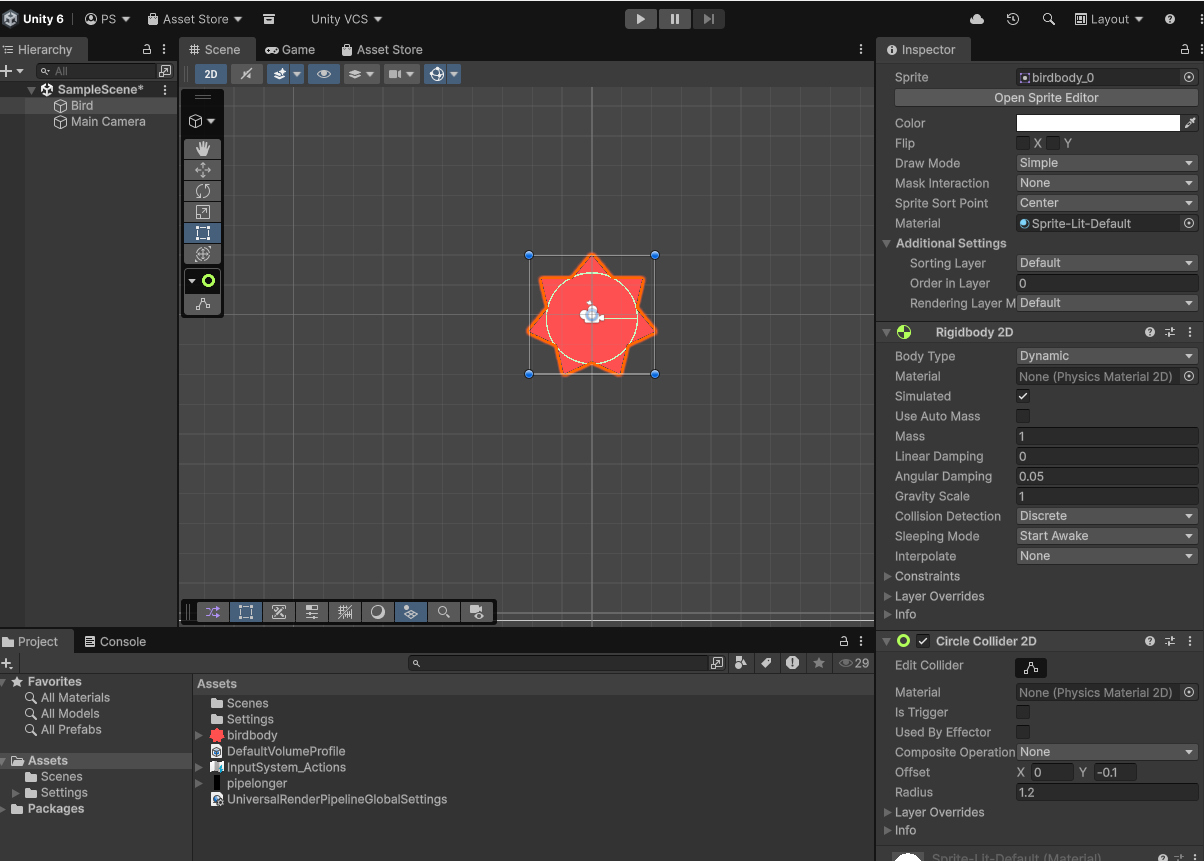
In the Scene View, the collider appears as a green outline around the bird, see Figure 6.
If are not seeing the
green Circle Collider 2Din the Screne view, it’s usually a visibility or settings issue
Enable Gizmos (most common issue, If Gizmos is off, colliders won’t be visible at all) - Go to the Scene View (not Game View) - Look at the top-left or right corner - Make sure Gizmos is turned ON
- Make sure the Bird is selected (Click the Bird GameObject in the Hierarchy)
If it is not properly aligned, adjust the Offset values in the Inspector. For better gameplay, slightly reduce the collider size so it is smaller than the visible sprite to make the game feel more fair and enjoyable, which allows the player get through pipes even if they just touched the edge.
- Creating a Script Next, we will create a script to control the bird’s movement.
- In the
Inspectorof Bird , clickAdd Component → New Script. - Name the script
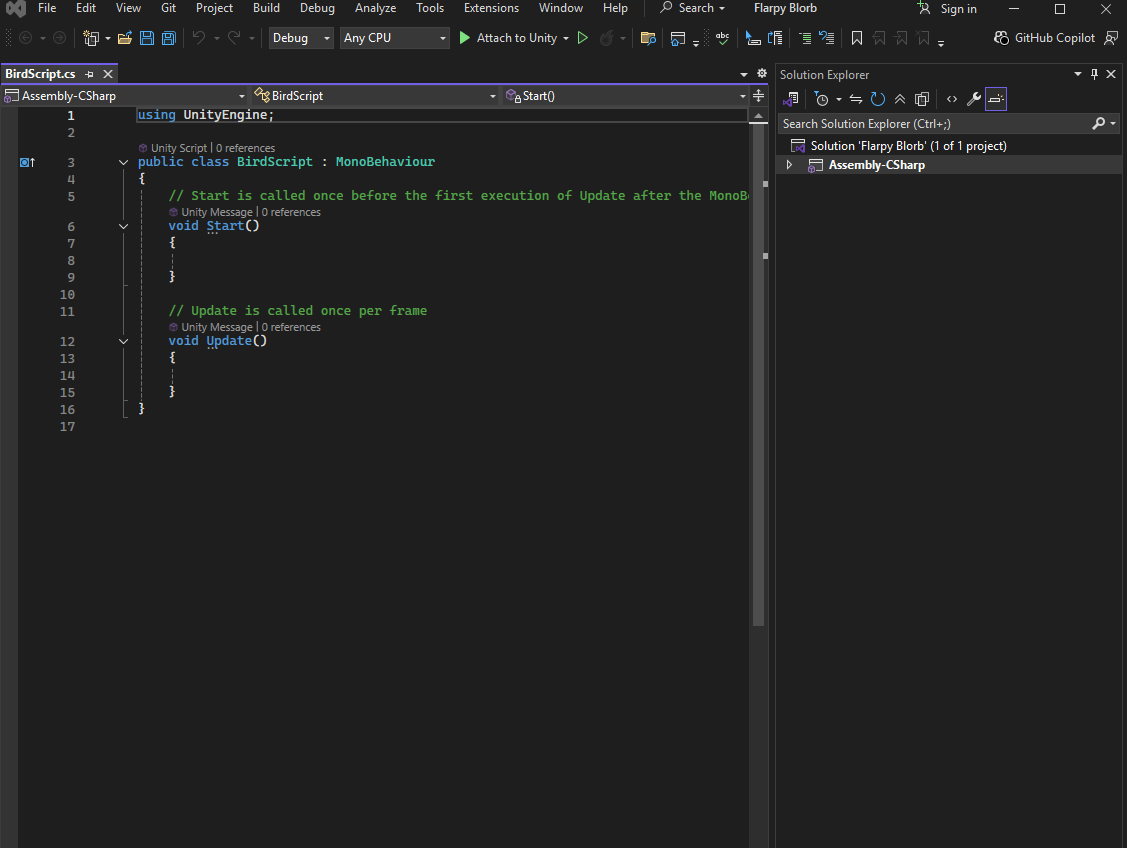
BirdScript. - Double-click the script to open it in Microsoft Visual Studio.
You are now ready to start programming in C#.
Understanding Start and Update: In the script, focus on two important methods:
- Start()
- Runs once when the script is enabled
- Update()
- Runs every frame while the game is running
These functions allow us to control behavior over time.
Accessing the Rigidbody 2D Component via Script: To control the bird’s physics, we need to access its Rigidbody 2D component through code.
A Simple Example: As a quick demonstration, add the following line inside the Start() method:
gameObject.name = "Physics Bird"- Save the script and return to Unity.
- Click Play. You will notice that the name of the Bird GameObject changes to “Physics Bird” in the Hierarchy.
We need to create a upward velocity to the bird. But we can see in the Rigidbody 2D’s component, under info, we’ll see a greyed-out field for velocity.
Up to now, script can talk to GameObject topic and transform. Right now, script is unaware of the other components.
We need to make a special slot on this script for a Rigidbody2D - so we can then talk to it and send it commands. This is called a reference. To add a reference, add the following line at the top of your script:
public Rigidbody2D myRigidbody;
- Save the script and return to Unity.
- In the Inspector, you will now see a new field.
- Drag the Bird’s Rigidbody2D component into this field.
This creates a reference, allowing the script to communicate with the Rigidbody.